目錄的
-
目錄的
- Antiquitäten & Kunst
- Auto & Motorrad: Fahrzeuge
- Baby
- Bücher
- Camping & Outdoor
- Feinschmecker
- Haustierbedarf
- Heimwerken & Garten
- IT和电子
- Kleidung & Accessoires
- Modellbau
- Musik
- PC- & Videospiele
- Sammeln & Seltenes
- Spielzeug
- TV, Video, DVD
- Telekommunikation
- Uhren & Schmuck
- Wellness & Beauty
- fashion & lifestyle
- institutional food services equipment
- medical equipment, accessories & supplies
- 个人护理
- 休闲爱好
- 办公设备,用品和配件
- 商业与工业
- 家居,建筑,装修
- 家用电器
- 摩托车及配件
- 武器和弹药
- 照相机
- 花园和庭院
- 运动,娱乐及休闲
- 食物
- 高保真音響
Filters
Search
Brodit 536684 Car Active holder Grey holder
凡购买和价格 (Advertising *)
顶部
技术特点
顶部
能量控制
| 电源类型 | Cigar lighter |
|---|---|
| 直流电压范围 | 12/24 V |
设计
| 类型 | Active holder |
|---|
人体工程学
| 内置充电器 | Y |
|---|
技术细节
| 可调整式 | Y |
|---|
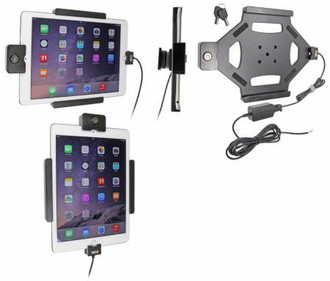
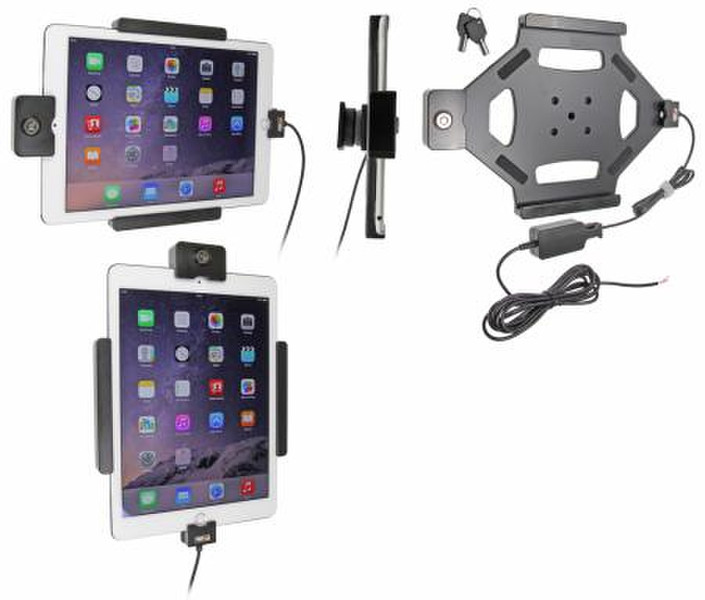
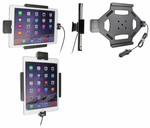
For Apple iPad Air 2, cig-plug, 2 keys
Holder with lock.
Active holder for fixed installation. With tilt swivel. With lock, 2 keys included.
The holder with lock is to be used when you want to have your tablet safely locked in place and still easy accessible, for example in shops, exhibitions, events, trucks, boats etc. The holder has a built-in lock, in order to take the device out from the holder you need a key (2 keys included).
This holder is equipped with a cig-plug cable for charging of your device. The holder is mounted onto a tilt swivel. This mean you can easily adjust the angle for better viewing and switch between portrait and landscape mode simply by turning the holder into desired position.
Tablets (Surfpads) should not be installed onto a car’s dashboard if they block the view or block key controls. ProClip (Brodit’s vehicle mounting bracket) is designed for installation of smaller devices like mobile phones and GPS devices, ProClip is not designed for large devices like tablets. In some vehicles the ProClip has an extra firm fit and can then be used also for installation of a tablet. If you want to place a tablet onto the car’s dashboard, each combination of tablet-car must be examined in detail by you in order to determine if such an installation is possible in the specific case. Consideration should be given to the position and how firmly the ProClip is in place, as well as the size of the tablet you wish to use. Brodit will not give any recommendations for such installations.
An installation of a tablet onto a vehicle’s dashboard is always done on the customer’s own responsibility. Brodit recommends to use tablets on the car’s headrest, installed onto the Brodit headrest mount.
INSTALLATION INSTRUCTIONS:
Important Note: The charger unit is fused internally with 2 A automotive re-settable thermal fuse, but if an external fuse is to be installed then connect a 2 A fuse holder and fuse inline with the Red wire close to the power source. Route the cable from the holder into the vehicle dashboard and secure the charger unit in place with the adhesive tape provided. Ensure the charger unit is securely mounted behind the dashboard in a well ventilated area that does not get hot! Connect as follows: 1. Connect the White wire to a Negative Ground connection of the vehicle or the vehicle chassis. 2. Connect the Red wire to a 12/24 Volt power supply in the vehicle that is controlled by the ignition switch of the vehicle. Installation of the holder:
Please read all of the instructions and look at the pictures before attaching the holder.1. Loosen the screw in the center of the holder so you can remove the tilt swivel attaching plate on the back. Place the attaching plate onto the desired position. Screw the attaching plate into place with the enclosed screws. Place the holder over the attaching plate so the screw fits in the hole in the tilt swivel. Screw the holder onto the attaching plate. Tighten the screw so the holder is firmly in place, but still can be adjusted. 2. Slide the device sideways carefully into the holder. Press the lock sideways onto the left part of the holder. Press the button to lock. 3. Use the enclosed key to open the lock. Remove the lock by slidning it sideways away from the holder. Slide the device sideways carefully out of the holder. 4. The holder is in place. Switch between portrait and landscape mode by turning the holder into desired position.
類似的優惠
顶部
-
支付方式
我们接受:


