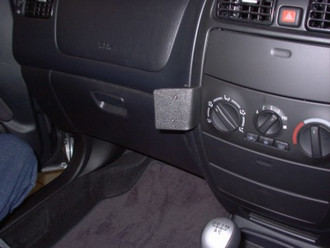
The ProClip is a mounting bracket for the vehicles dashboard. Onto the Proclip you can install e.g. a holder for your mobile phone or PDA or a handsfree set etc. Safe and convenient -always within easy reach. The ProClip is car specific and easy to install. The installation is quick, no special tools or dismantle of the dashboard is required and it will not damage the interior of the vehicle. Made in black ABS plastic. Comes with detailed instructions. Angled mount Attention! Read all instructions and look at the pictures before attaching the ProClip.
This ProClip consists of two parts.
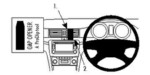
Part 1: Attaching piece (the smallest part)
Part 2: ProClip face plate.
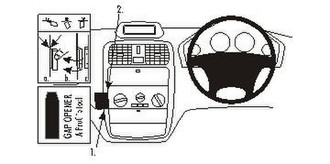
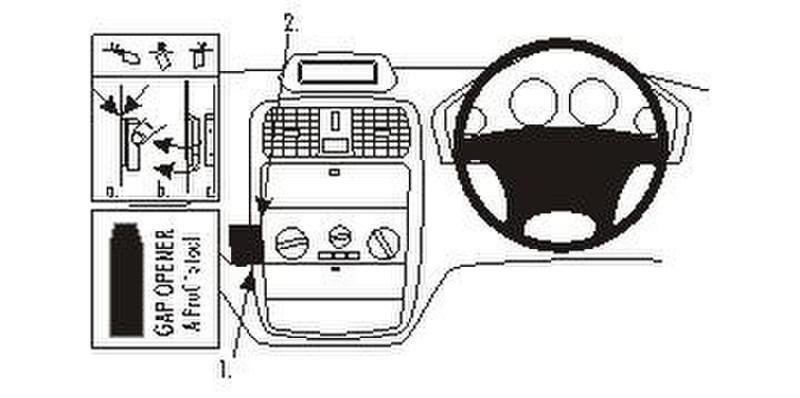
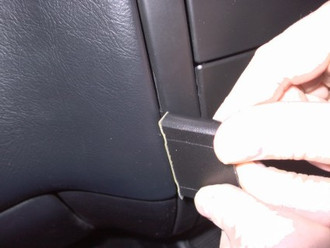
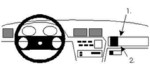
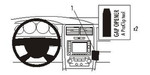
1. Peel off the cover of the adhesive tape on Part 1. Place Part 1 in the position as shown in the picture, with the lower edge aligned with the gap in the dashboard. Press the angled edge of Part 1 into the gap between the dashboard and the frame surrounding the control panel. Press leftwards on Part 1, away from the steering wheel, so the angled edge hooks behind the frame and the adhesive attaches.
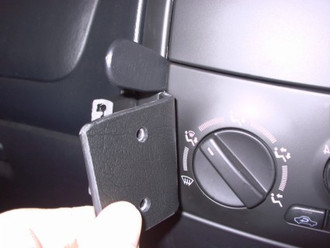
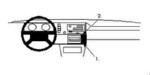
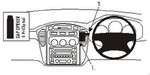
2. Press the thin end of the enclosed gap opener into the gap between the control panel and the surrounding frame to widen the gap. Open up the predrilled holes in Part 2 with a screwdriver (Philips). Press the right edge of Part 2 into the gap below the gap opener. Adjust Part 2 upwards/downwards in the gap so you feel that both angled edges hook behind the control panel. Pull out the gap opener.
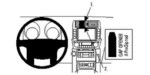
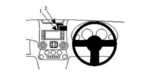
3. Press forwards on the left side of Part 2, so it goes over Part 1 and so the holes in Part 2 match the holes in Part 1. Screw Part 2 onto Part 1 with the enclosed screws. NOTE! Screw the screws straight into Part 1, in the same angel as Part 1.
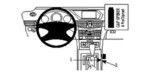
4. The ProClip is in place.